Fabric Pom Pom's
What you'll need:
-old fabric
-scissors
-needle
-thread
-headband (optional)
What to do:
1. You'll need some small circular object that will allow you to trace a circle onto your fabric. You need a minimum of 6 circles (I usually use 7-8) to make one pom pom.
2. Cut out the Circles you've traced on the fabric.
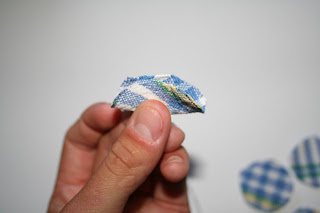
3. Now, fold one of the fabric circles in half, and fold it in half once again. It will be small, which is okay. Take your needle and thread and sew into the top of your fabric (at the creased point). Push it to the end of your string, and do the same for the rest of the fabric circles. Once you have them all assembled on the thread you should be able to just tie a tight knot where your last fabric piece is so it bunches the pieces together. Personally, I like to make another stitch from the first piece to the last to ensure it's bunched enough, but you don't have to do this. Once finished, cut off the excess string.
4. You should have a nice, small fabric pom pom. You may attach a pin to it if you want to wear the pom pom's on clothing or anything else. Underneath is a photo of a headband I made by supergluing multiple pom pom's onto a plain headband. It's fairly easy to make adornments to clothing or other accessories with these little flowers, so be creative with 'em!
- Abby


No comments:
Post a Comment